
How to Unformat an SD Card and Restore Data with Windows, Mac or Phone
Formatting a storage device is necessary for using it. That’s why many storage devices today, like most SD cards, come preformatted, allowing us to start using them right out of the box.
And yet, formatting can also be catastrophic and lead to data loss when, for example, you select the wrong option in your camera’s menus or an app malfunctions on your smartphone.
Thankfully, the methods that we will see in this article, as personally tested by members of our team of data recovery specialists, make it possible to practically unformat SD memory cards.
Can You Really Unformat an SD Card?
Although it’s impossible to undo formatting SD cards or other storage devices, reverting a format’s results is often feasible – with some caveats.
- Data on an SD card can be recovered after a quick format, as we’ll see later in this article, since such a process only affects its partition table and leaves the actual data untouched.
- If the SD card was kept in use after a quick format, old data that was overwritten won’t be recoverable.
- For SD cards with minimal physical damage that can still be detected and accessed by a computer, some (or even all) data might still be saved using specialized data recovery software.
- When an SD card has been erased with a full format or a secure erase process (that overwrite all existing data) or is damaged so much that a computer can’t detect it, recovery is impossible.
That’s why you should be absolutely sure you need to format an SD card and there isn’t any valuable data on it before proceeding with the process. If in doubt, check our guide on how to format SD cards without losing data.
Unformat SD Memory Card With Software on PC (Windows & Mac)
It’s best to use a data recovery solution that specializes in scanning existing file structures and memory sectors and “fishing out” your data from the SD memory card to another storage device. “Solutions” like the two partially free tools we’ll see in this section, that excelled among their peers in our tests.
Other tools may promise to perform an SD card “unformat” by recreating all “data structures” that were eliminated by a format process. We suggest you avoid any solutions that perform more writes on your SD card since that increases the chances more data will be overwritten – and lost forever.
Option 1: Disk Drill
Disk Drill is the first app we always turn to when we want to “unformat a memory card” by regaining access to its contents. It’s one of the consistently highly reviewed data recovery solutions and proven to be trustworthy and safe.
What matters most in the context of this article are the exceptional results it produces in combination with unmatched levels of user-friendliness. The latest addition to Disk Drill’s new sixth family of versions, its Advanced Camera Recovery (ACR) module, is further proof of that.
If you’re trying to recover photos or videos from an SD card you were using in your camera, or drone, Disk Drill’s ACR module is your best friend. Disk Drill’s search and recovery engine can find and bring back hundreds of media files the app “knows about”, like RAW, JPG, PNG, BMP, and TIFF images, MP4, MPEG, AVI, or MKV videos, and more. The new version’s ACR module comes with advanced tech that can additionally locate all individual pieces of fragmented videos and successfully reconstruct them into playable media.
Still, for this article, we’ll use Disk Drill’s more generalized approach, which doesn’t seek only photos and videos but any type of file, including documents and archives. The app’s free version allows recovering up to 500MBs of data, which is more than enough for getting back a bunch of documents, photos, and small videos.
To “peek under” a formatted SD card’s “empty surface” and get back your underlying files with Disk Drill:
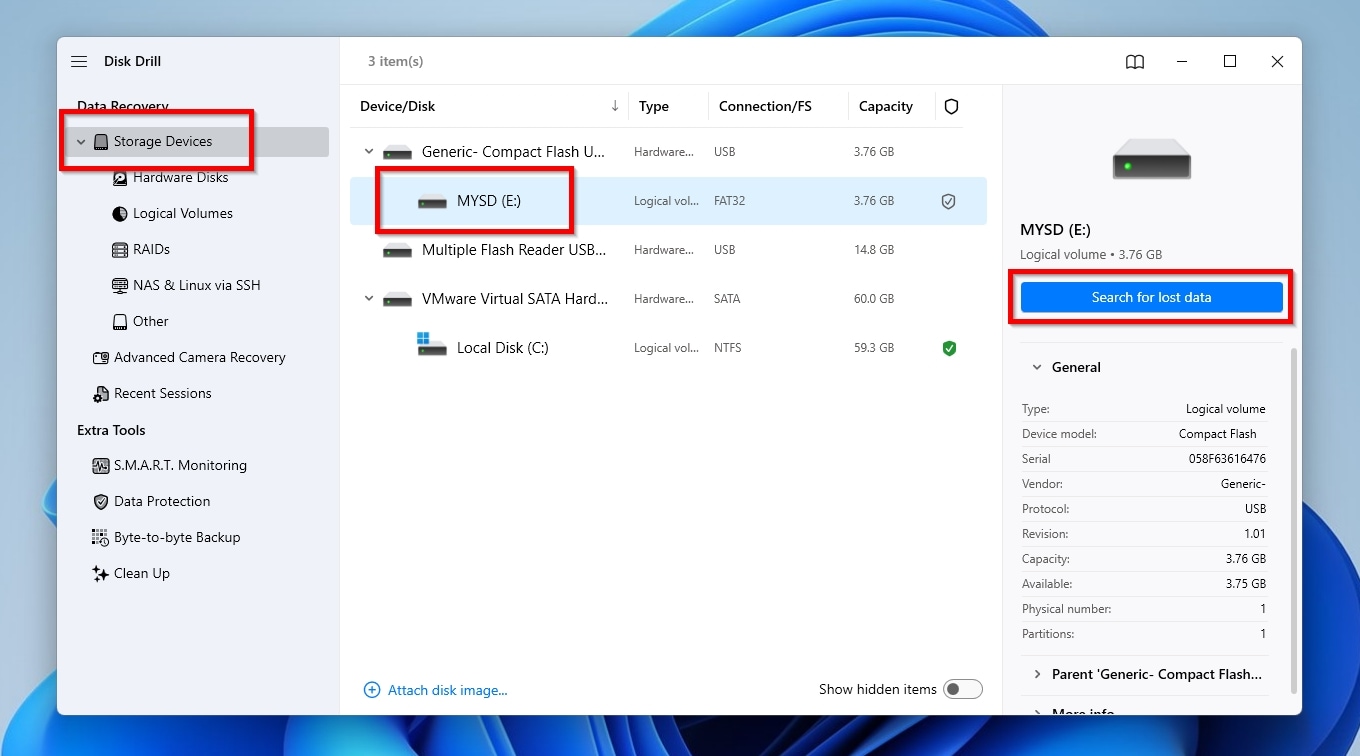
- Download the app from its official site, and install it. With your SD card connected to your PC and detected, run Disk Drill. While on the Storage Devices page, select your SD card from the app’s Device/Disk list. Then, click Search for lost data.
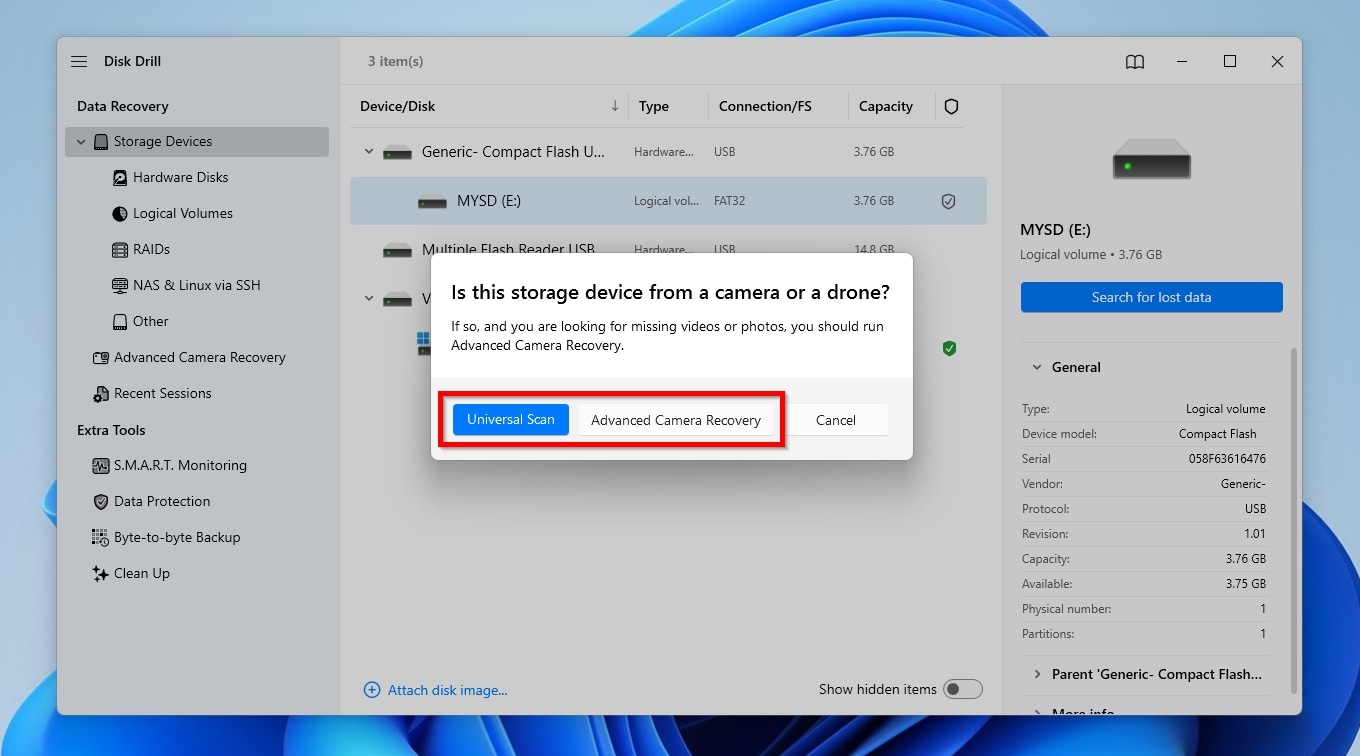
- When Disk Drill asks you if the selected storage device is from a camera or drone, you can use its new Advanced Camera Recovery module, which specializes in media files. For this article, to find every type of file, we went for the more generalized Universal Scan.
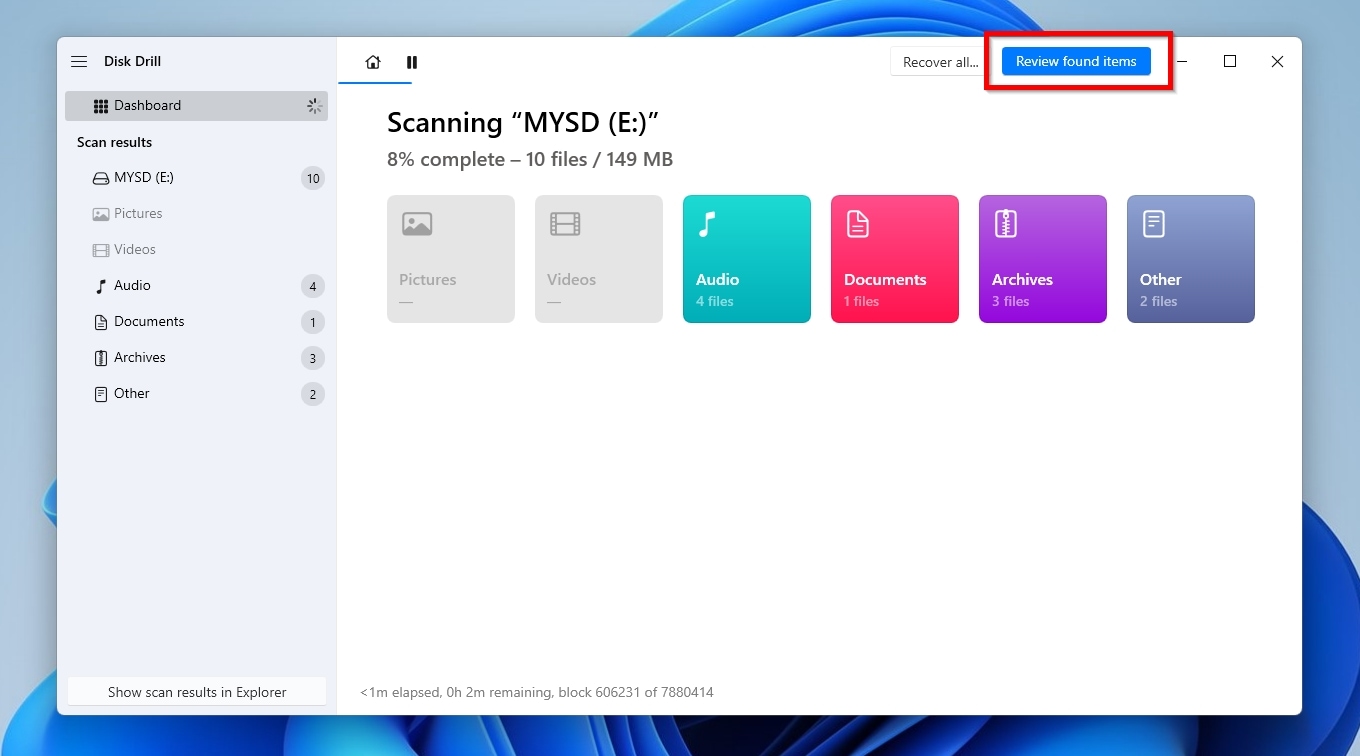
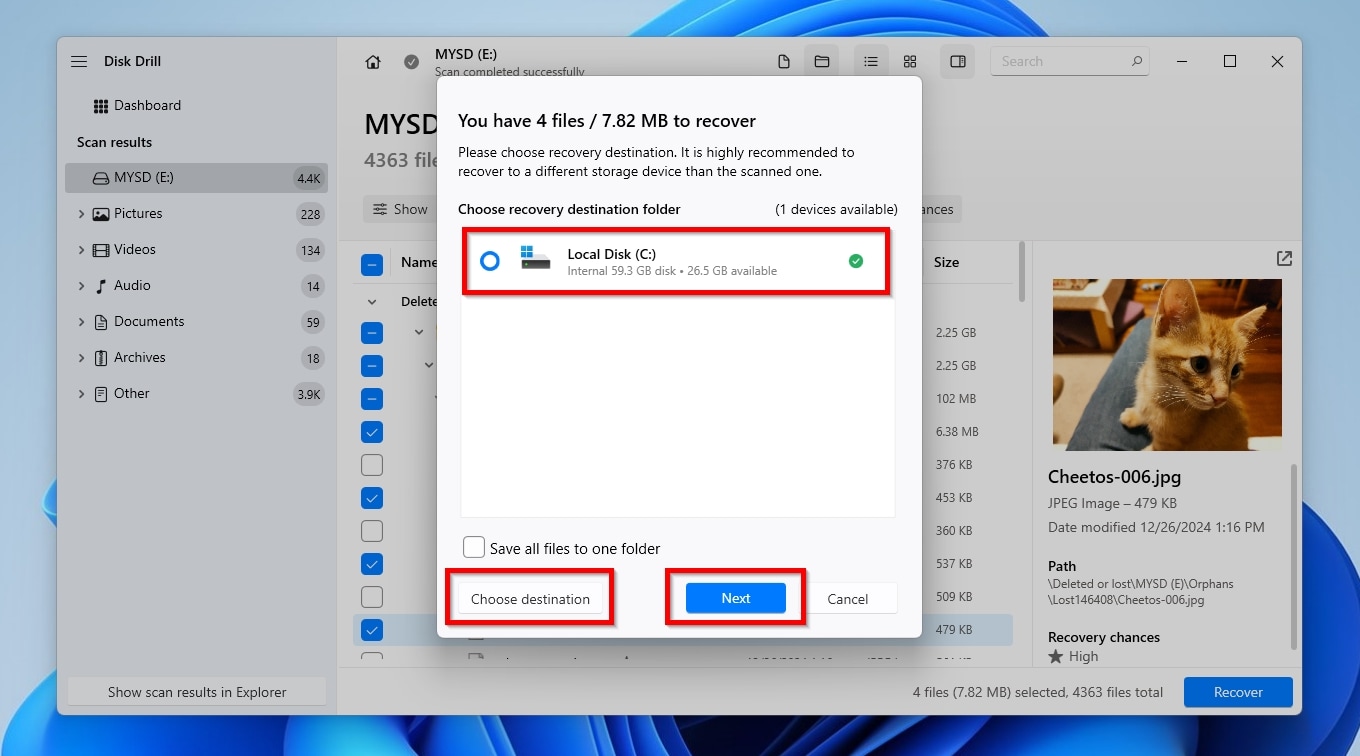
- When Disk Drill’s scan completes, click Review Found Items. You can use the categories on the left and the filters above the results to quickly locate specific files based on criteria like their type, size, last modification date, etc. Find the files you want back, mark them for recovery with a checkmark on their left, and click Recover.
- Select where you want to store the recovered files. Make sure to select a different device than the SD card from which you are recovering data to avoid overwriting the very files you’re trying to recover. Then, click Next.
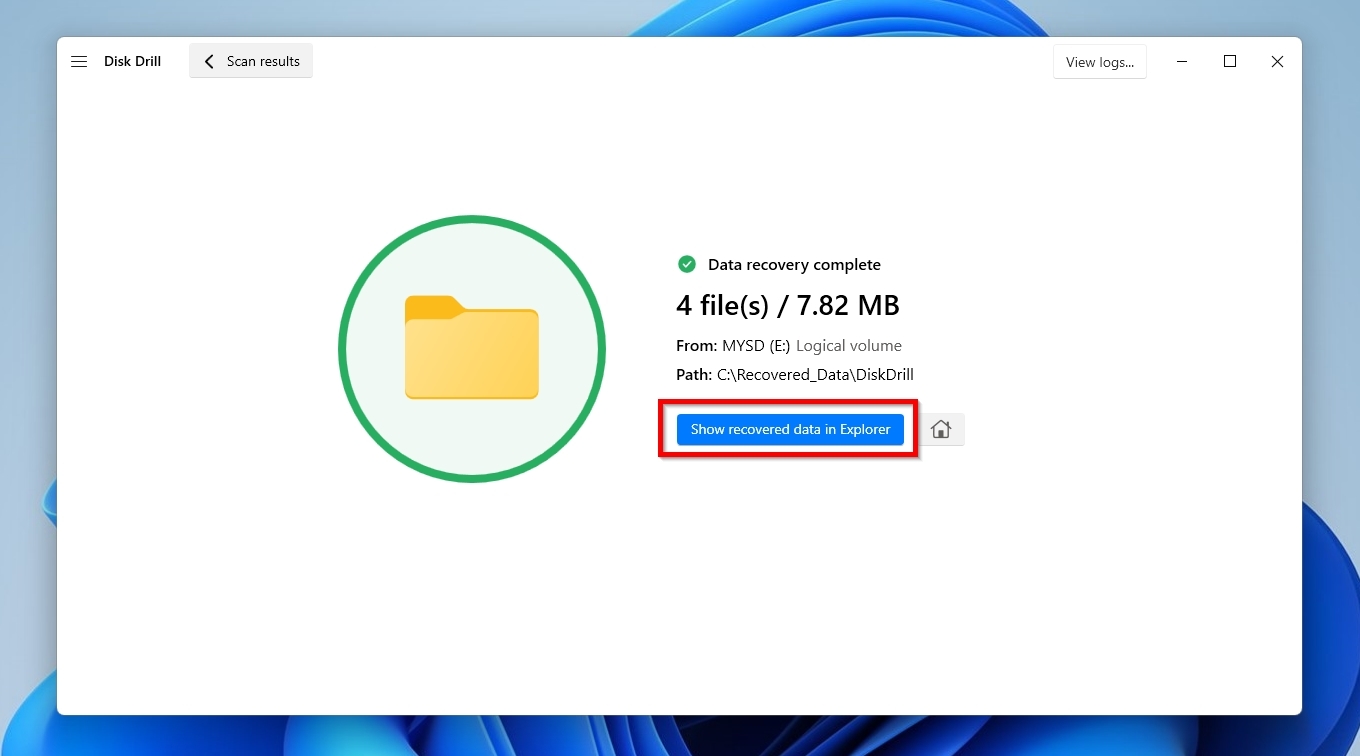
- When the process completes, you’ll find all the files you marked for recovery back in the folder you chose in the previous step.
Option 2: R-Studio
R-Studio is one of the most advanced and feature-rich data recovery solutions. It can recover data even from severely corrupted SD cards and supports the most prominent file systems. Still, we’ll skip diving into more details, for that would require a whole review – and we already have one!
R-Studio’s complexity is justified since it’s targeted primarily at specialists and demanding users who want absolute control over the data recovery process. This, though, also means it might not be the best if all you want is an easy way to recover photos and videos from a formatted SD card. Also, its freemium version comes with a severe limitation: it can only recover files up to 1024KBs in size. If you were using your recently formatted SD card in a camera, it will likely only allow you to recover some thumbnails.
This is how to unformat an SD card’s new “empty surface” and peek at the existing files with R-Studio:
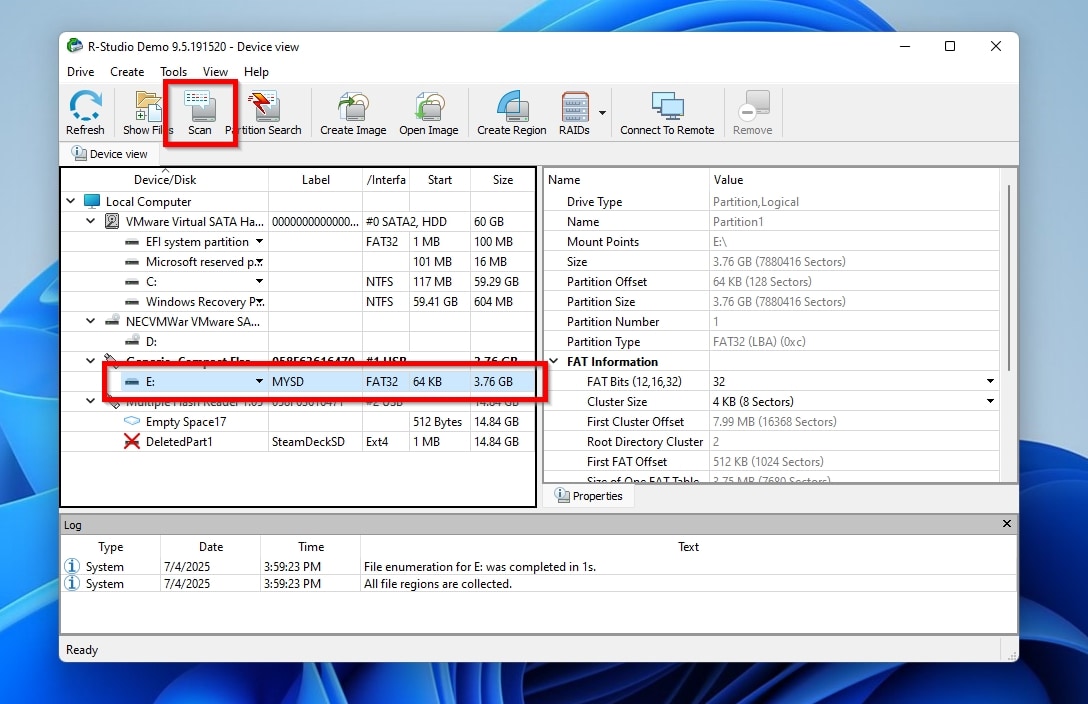
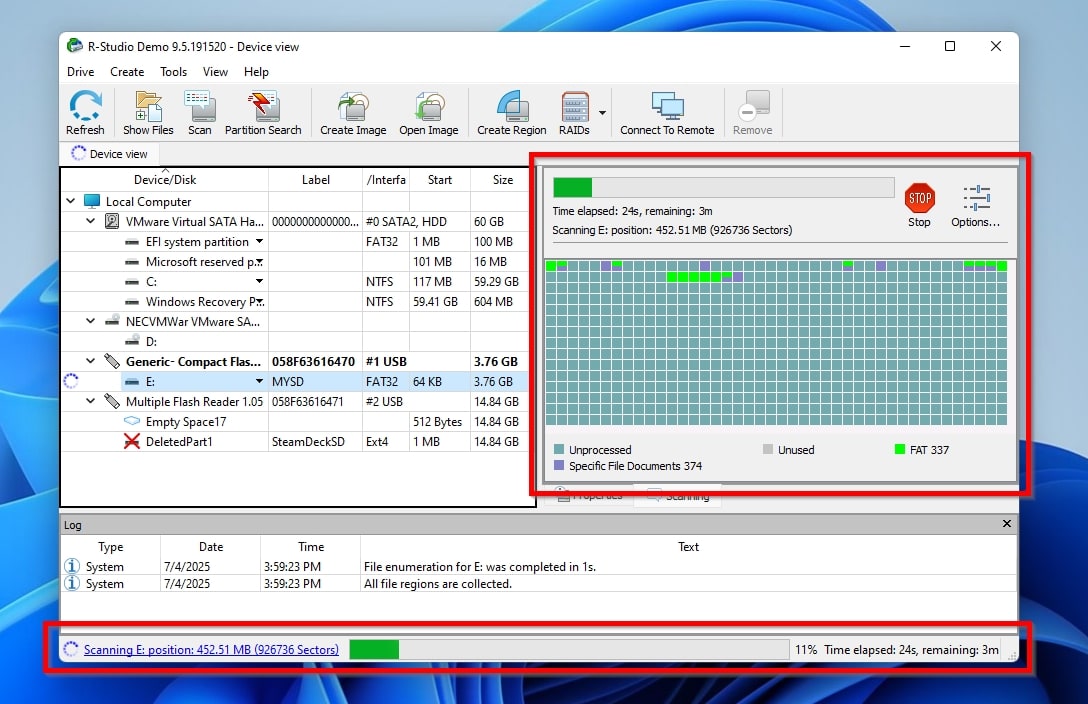
- Make sure your SD card is connected to your PC and detected. Download the app from R-Studio’s official site, install, and run it. Select your SD card’s entry from R-Studio’s Device/Disk column, and click Scan
 .
. - Leave the default options as they are and click Scan.
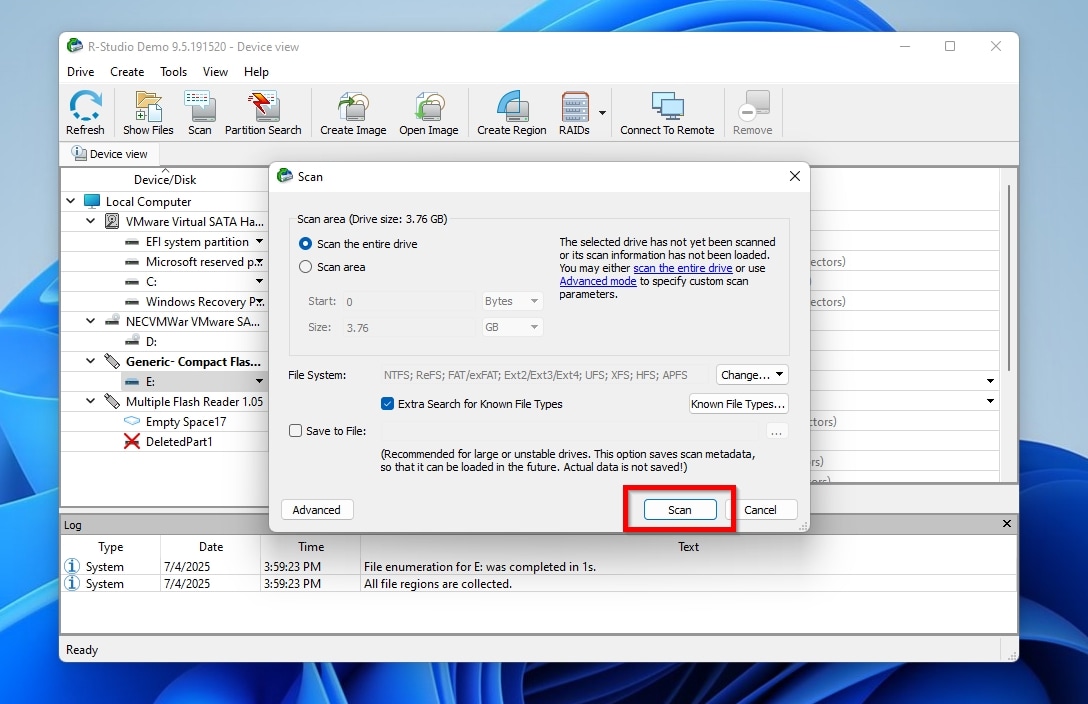
- Give the app time to complete its scan.
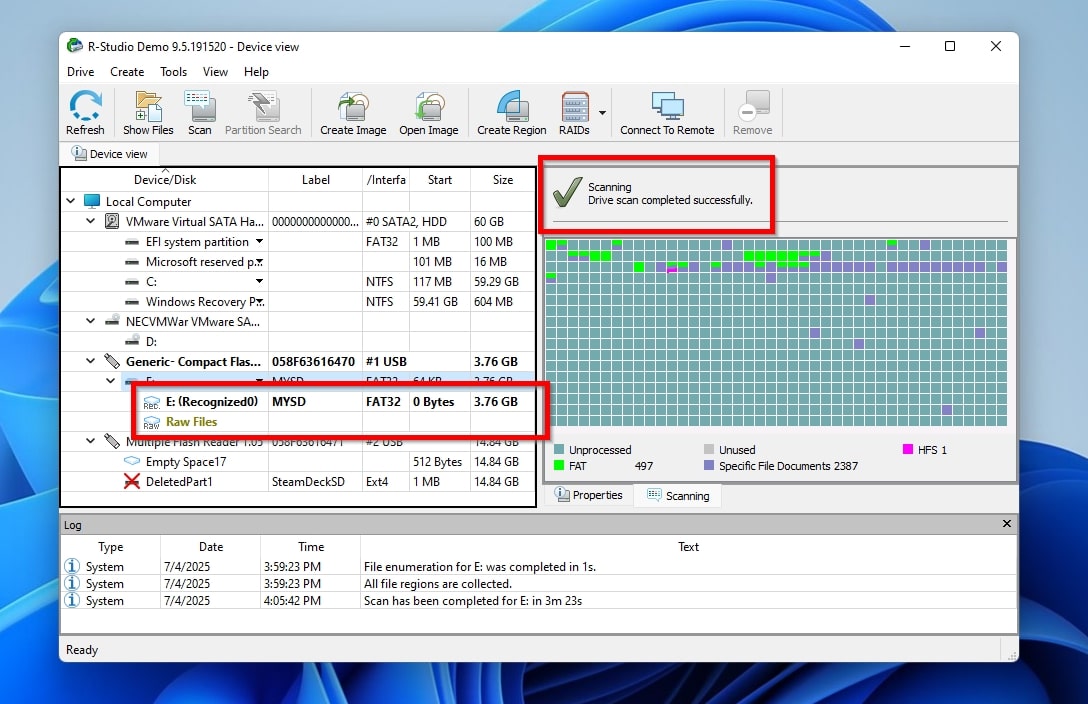
- When R-Studio’s scanning completes, it will show one or more past volumes it detected on your SD card. Double-click on one to have R-Studio reveal its contents.
- Go through all folders recursively and try to locate within them the files you want to recover.
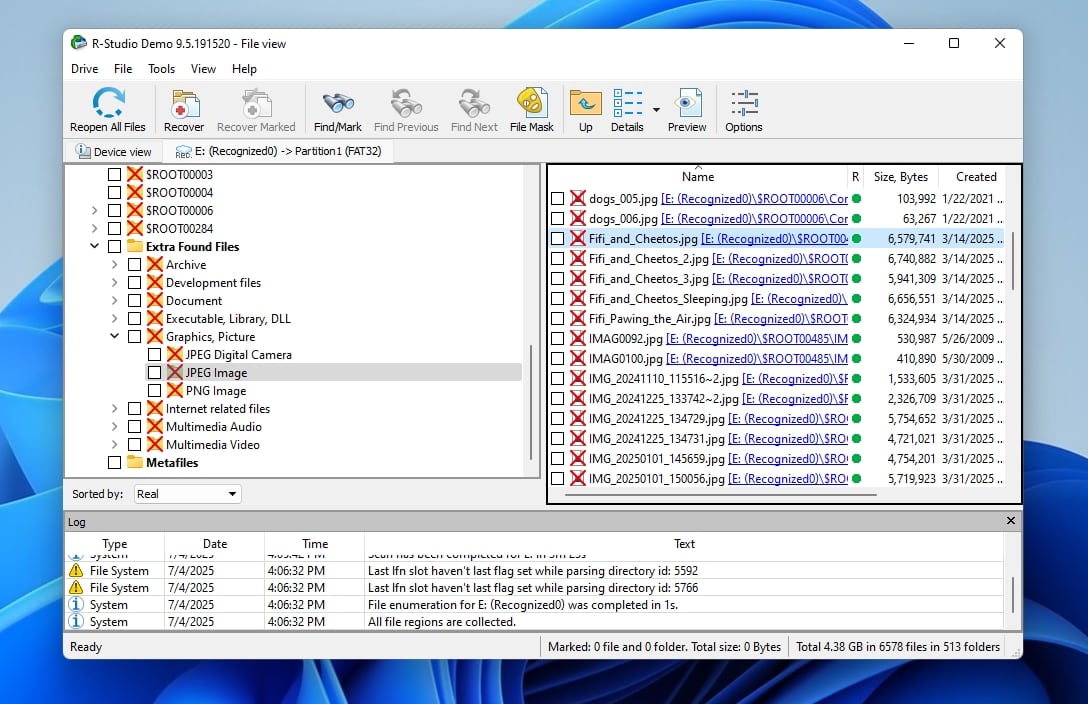
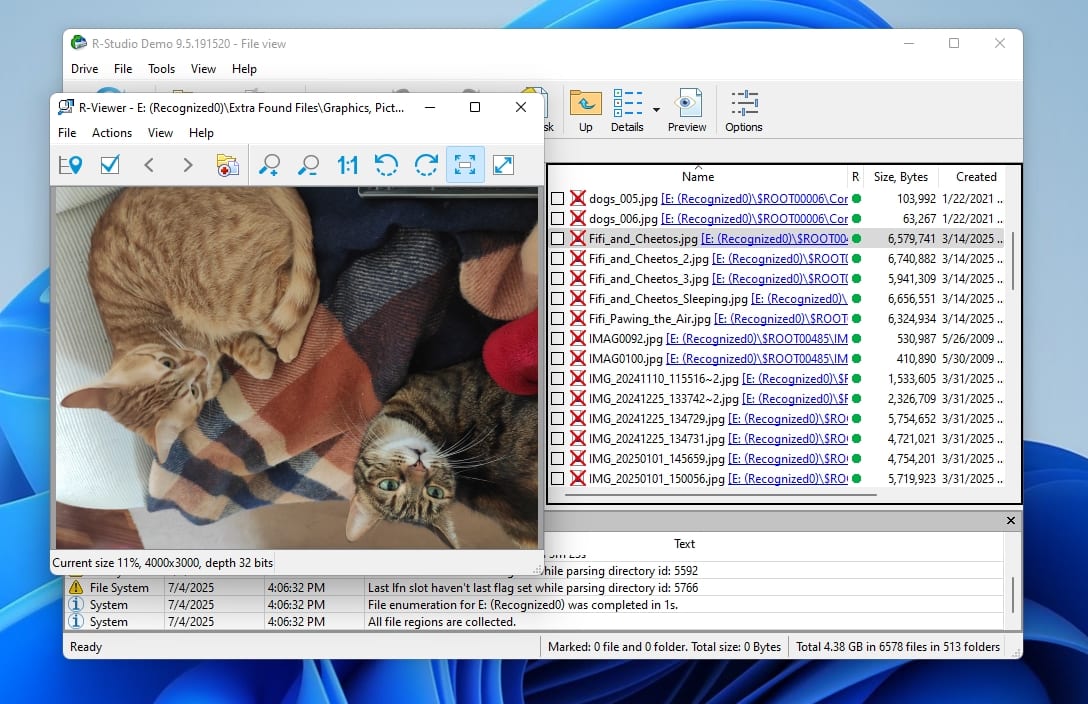
- Double-clicking on a file may allow you to see a preview of its contents, depending on its file format.
- Place a checkmark on the left of the files you want to recover and click Recover Marked.
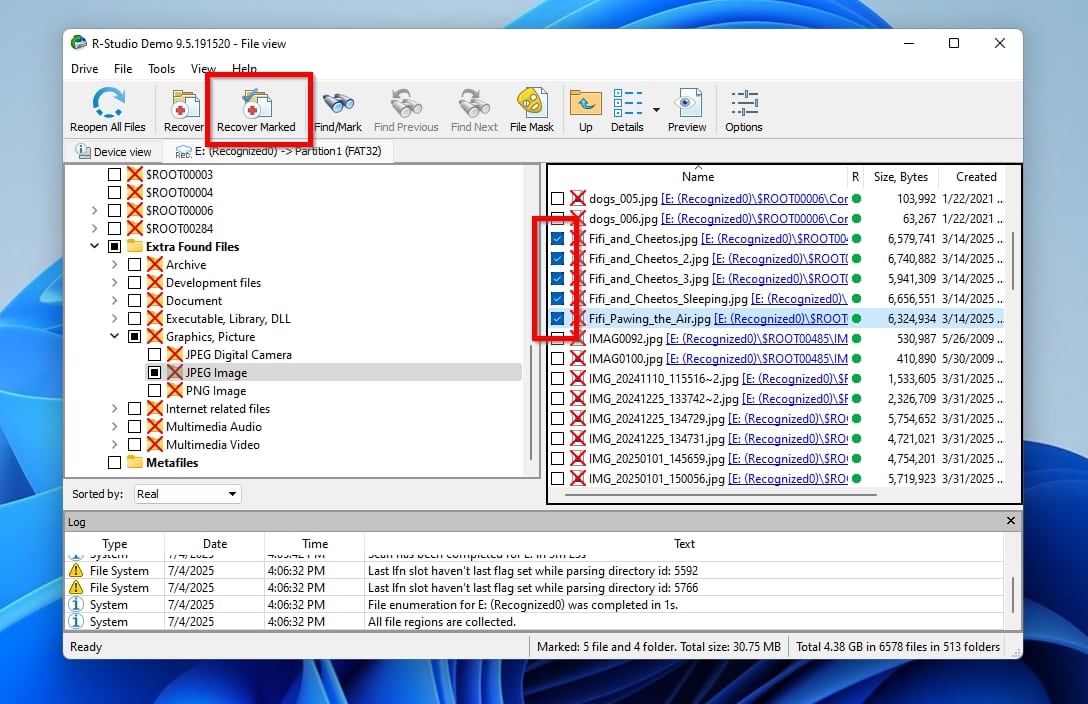
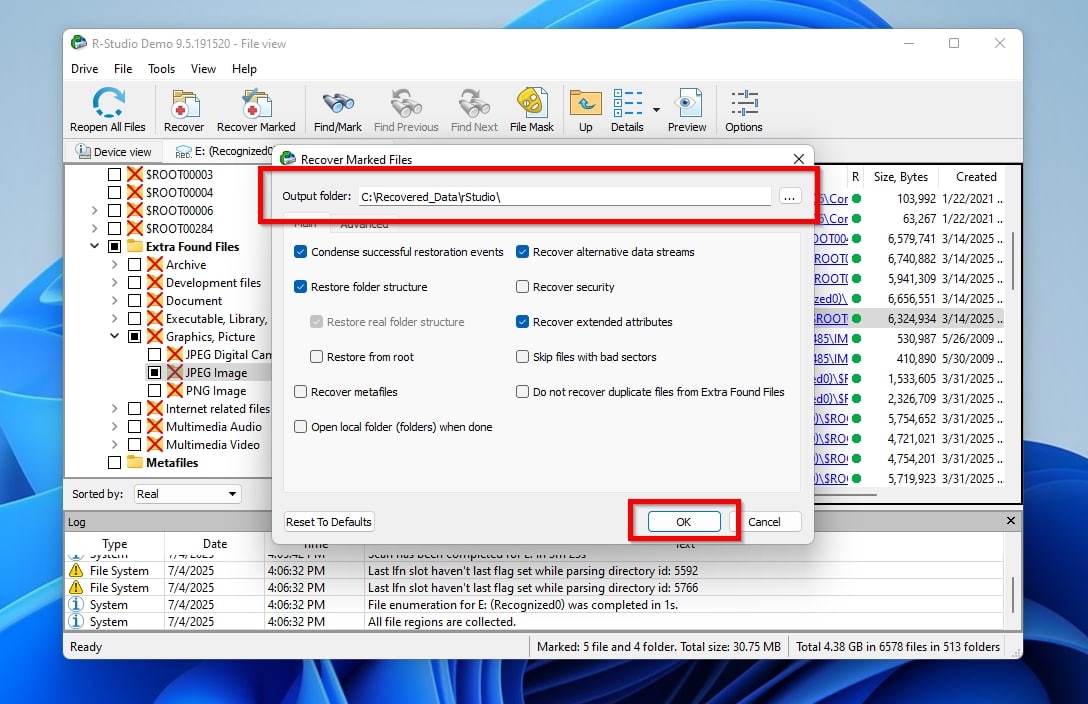
- Select the folder where you want to store the recovered files and click OK. Soon, you’ll find your recovered files in that folder (if they were under 1024KBs).
How to Unformat an SD Card on a Phone Without a Computer
Although it’s not possible to directly unformat an SD card on camera, the story’s quite different if this “camera” was an Android-powered device like your smartphone or tablet. Specialized apps like DiskDigger were created precisely for such scenarios.
To unformat your SD card for free on your Android device using DiskDigger:
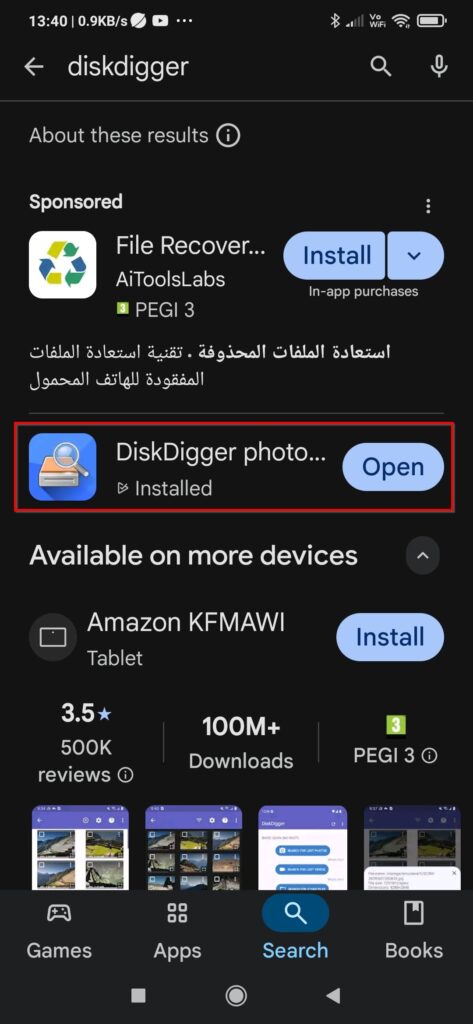
- With your SD card connected, mounted, and accessible on your Android device, search for DiskDigger on the Play Store and install it.
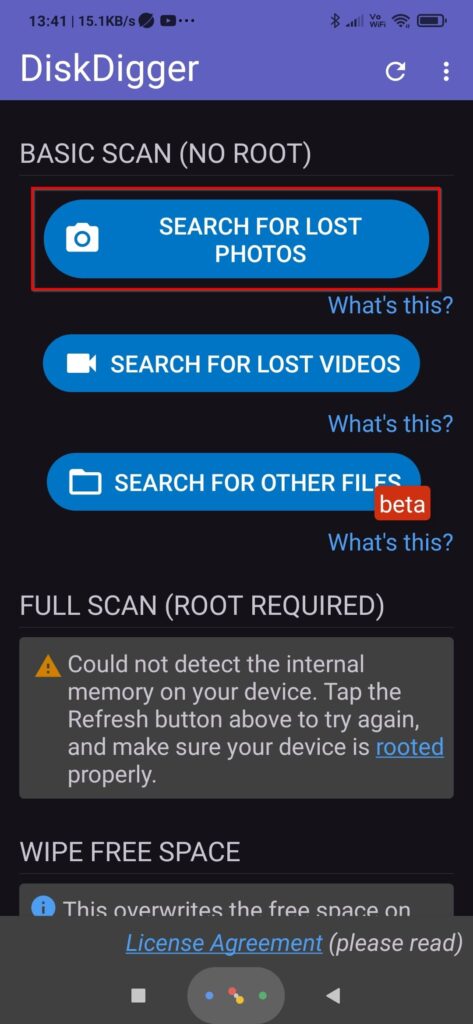
- Run DiskDigger and tap on Search for Lost Photos or Search for Lost Videos, depending on the type of media you want to find. For this article, we’ll be looking for photos.
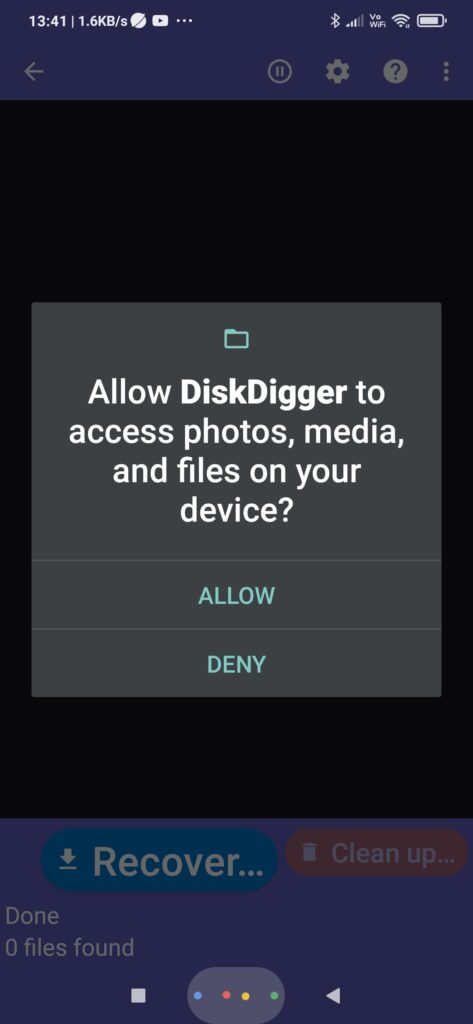
- Grant DiskDigger access to photos, media, and files on your device, or it won’t be able to scan your SD card and recover anything.
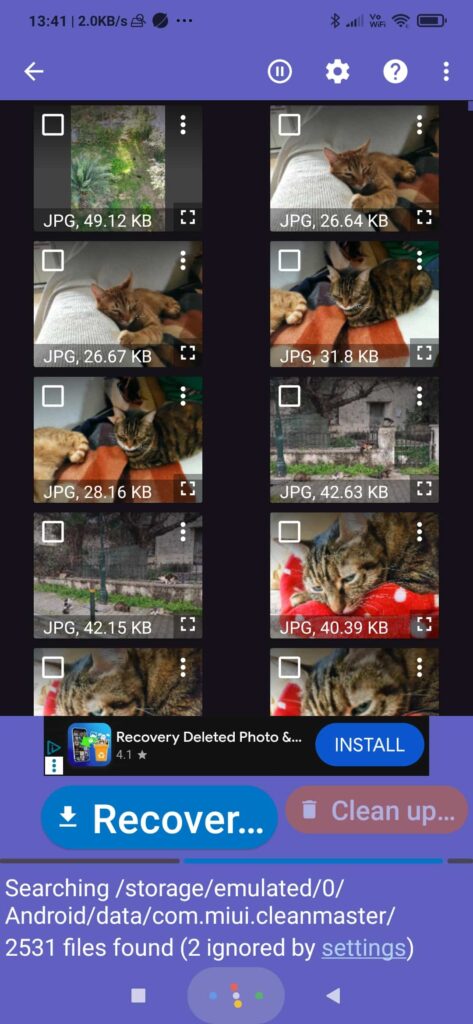
- DiskDigger will immediately start presenting the results of its scan, extending them as the process progresses. When you see the files you want to get back, you can recover them without having to wait for the scan process to finish.
- Tap on the little empty box on the top left of each file you want to get back to mark it for recovery. Then, tap Recover.

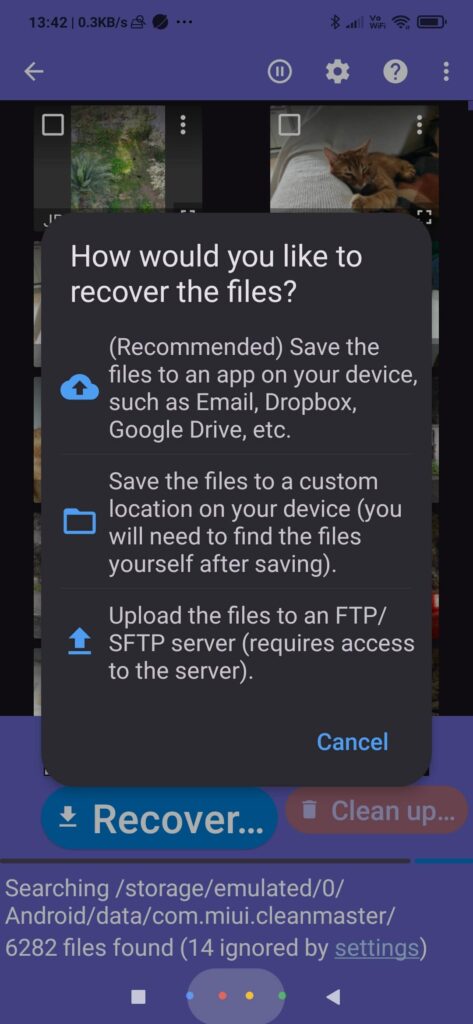
- Choose where you want to store the recovered files. You can a) “push” them to a supported app or service, b) save them to a custom location on your device, or c) upload them to an FTP/SFTP server. Most users will usually want to go for the more convenient first option, which we’ll also be using here.
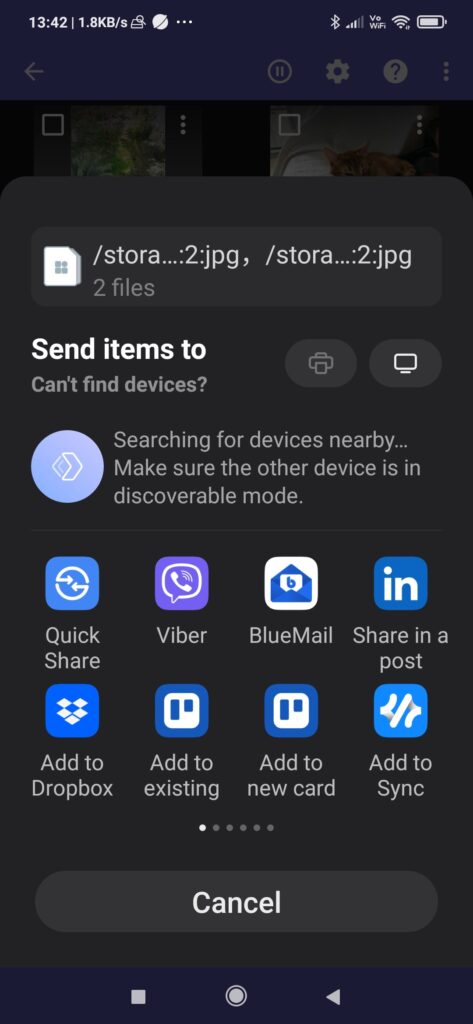
- Select where you want to “send” the recovered items. You can push them to a cloud-based file-hosting service like Dropbox, attach them to an email, etc. The available options depend on the apps and services installed on your device.
- 🫚They can’t analyze your device’s entire storage or locate and bring back all files unless your device is rooted. On non-rooted phones, it’s usually possible to recover smaller versions of photos – like compressed copies, preview versions, cache entries – but not the originals.
- 💾 You must point them to adequate local or cloud storage space “outside” your SD card for storing the recovered data.
- 🔐 They cannot bypass encryption – but can work with encrypted volumes (if they’re mounted on the device and generally accessible).
- 📱 Their bite-size and “confined” interface prevent them from offering advanced features found on desktop alternatives (like support for filters, estimating recovery chances, etc.).
Scanning your SD card from a computer using a card reader is always the best option, avoiding most of those limitations. Use on-device scans only when a computer isn’t available, or your SD card is encrypted and accessible only on the particular device.
Is it Possible to Undo SD Card Formatting with CMD
It’s natural to be grasping at straws when it seems you’ve lost all your precious photos and videos and are searching for ways to unformat a memory card. However, you should take with a massive grain of salt any claims that it’s possible to unformat SD cards for free with CMD or PowerShell, the Windows’ terminals, using cryptic commands.
At best, such claims may be mistakenly presenting terminal-based tools (that work directly in the terminal instead of having a graphical user interface) as “commands”. Indeed, there are such tools you can use, and we’ve already reviewed one of the best, TestDisk.
At worst, they might be misrepresenting how and when some commands can help, because of a misunderstanding of their purpose and functionality. Let’s go over three such cases.
Attrib
Attrib accompanies Microsoft’s OSes since the MS-DOS 3 era, allowing the manipulation of file attributes. It’s still supported in Windows, up to the latest Windows 11. However, although it can “unhide” files that turned invisible or render a read-only file writable again, it can’t help when you need to access data on newly formatted media.
Usage Examples:
attrib: displays the attributes of all files in a folder.attrib FILENAME: displays the attributes of a single file.attrib -H -R C FILENAME: removes the “hidden” (-H) and “read-only” (-R) and sets the “compressed” (+C) attributes to a file (FILENAME).
Undelete
Many people still believe they can use the undelete command to get back any lost files. And yet, this command has been deprecated for close to 30 years, since DOS 6.22!
According to Microsoft’s DOS 6.22 official manual, it worked more like an ancient version of modern takes on data protection, like Disk Drill’s “Vault”, in that you first had to set it up “to monitor and protect” a drive to be then able to “undo” accidental deletions on it.
Since it’s irrelevant and useless today, we’ll skip the rest of its details.
Unformat
Like undelete, the last time the unformat command was useful was when DOS 6.22 was the OS of choice. Thus, we won’t dive into it, either.
Long story short, unformat could, for example, be used right after a format process, as unformat /PARTN to restore a storage device’s partition tables, as unformat /U to “undo” the format by restoring the previous boot sector and file system (if additional formatting information was stored on the device), etc.
Use Professional Data Recovery Services to Unformat Your SD
We saw how to unformat SD cards with specialized tools in this article. However, we must also note that this Do-It-Yourself approach is not for everyone since it requires at least some basic knowledge about storage devices and significant time and effort. Thankfully, you can delegate such tasks to data recovery experts.
For example, the same people behind Disk Drill also offer exceptional data recovery services. Such services come with additional costs and time delays compared to DIY data recovery. Still, CleverFiles Data Recovery Center’s somewhat unconventional (and quite enticing) business model offers free initial diagnostics and comes with zero fees if no data is recovered.
Frequently Asked Questions
How to unformat an SD card for free?
It’s possible to regain access to the data lost after a format using specialized data recovery tools like Disk Drill. Its free version comes with a 500MB recovery size limit, which should be enough for getting back your most crucial files, but you’ll have to purchase a licence for more extensive recovery tasks.
Can I unformat an SD card on an Android phone?
You may be able to get back some (or all) of the photos lost after a format using a tool like DiskDigger on your Android device as we saw in this article.
Is it safe to use free recovery software?
It’s best to avoid tools you may find on sketchy sites that nobody’s ever heard about. However, if this “free recovery software” is a free, “freemium”, or trial version of an established solution downloaded from its official site, then the answer’s most probably “yes, it should be safe”.
Can I unformat the SD card on Mac devices?
Technically not, but as we saw in this article, data recovery solutions like Disk Drill enable you to save the files that remain on the SD card after a quick format.
Can formatting damage the SD card physically?
Normally, a format process cannot cause physical damage to an SD card. Such damage may only be possible in cases of custom solutions created explicitly to misuse hardware with moving parts, like old floppy drives or HDDs, for pure research or entertainment.
What is the best free unformat SD card software?
Specialized data recovery tools, like Disk Drill or R-Studio, can enable you to “regain access” to and bring back files lost after a quick format.
Can you tell me how to unformat an SD card on my camera?
We’re not familiar with any camera that comes with such recovery or backup solutions built-in. Still, if the term “camera” refers to one on an Android smartphone or tablet, tools like DiskDigger can help recover files lost after a format.

Odysseas is a geek with over three decades of experience in tech who occasionally lost vast amounts of data. “Data” he managed to recover most of the time using various recovery solutions.
Eventually, he joined our team to write about such data loss and recovery scenarios and all related software and methods.
Despite having written thousands of articles and tutorials for various popular outlets, he considers his data-recovery adventures an ongoing learning experience.
- Frisco, Texas, United States
Yevgeniy Tolkunov is Hardware Engineer at ACE Data Recovery. Yevgeniy has a Master's Degree in Physics, Information Technology; 15+ years of experience.